Iron Fish is a privacy cryptocurrency that uses advanced encryption to ensure transaction confidentiality, appealing to those prioritizing anonymity. It is proof of work cryptocurrency, that’s why you can mine Iron Fish. We will everything you need to know, including the best GPUs, choosing between solo and mining pools, and optimizing your ironfish hashrate. Learn how to select the best ironfish mining pools, set up your mining software, create an Iron Fish wallet, and maximize your returns on both Windows and HiveOS.
Key features:
- mainnet blockchain launched as of April 20th, 2023
- proof-of-work L1 chain
- all transactions are private and validated by zero knowledge proofs (ZKPs)
- supports custom assets

Find out more about Iron Fish in our full coin profile article.
Why should you mine Iron Fish?
Mining Iron Fish appeals primarily to the people who are interested in mining crypto. Especially for people that want to try it at home just by their GPU, when they are not using it. As mining crypto can be very challenging, Iron Fish seems to be one of the best options for GPU miners right now. Based on the profitability of the coin according to whatomine.com, you can earn around 50 cents a day on a basic older generation card RTX 3060 Ti. This could seem not worth but if you have free electricity, or have multiple GPUs ready to work (GPU mining rigs), you can earn some money on the side.
Profitability of Iron Fish mining
As mentioned above, for basic older generation Nvidia GPU RTX 3060 Ti you can earn around 50 cents per day. Keep in mind that profitability is changing every day, it depends on the state of the crypto market (the price of IRON) and the difficulty of mining $IRON (How many people mine it).
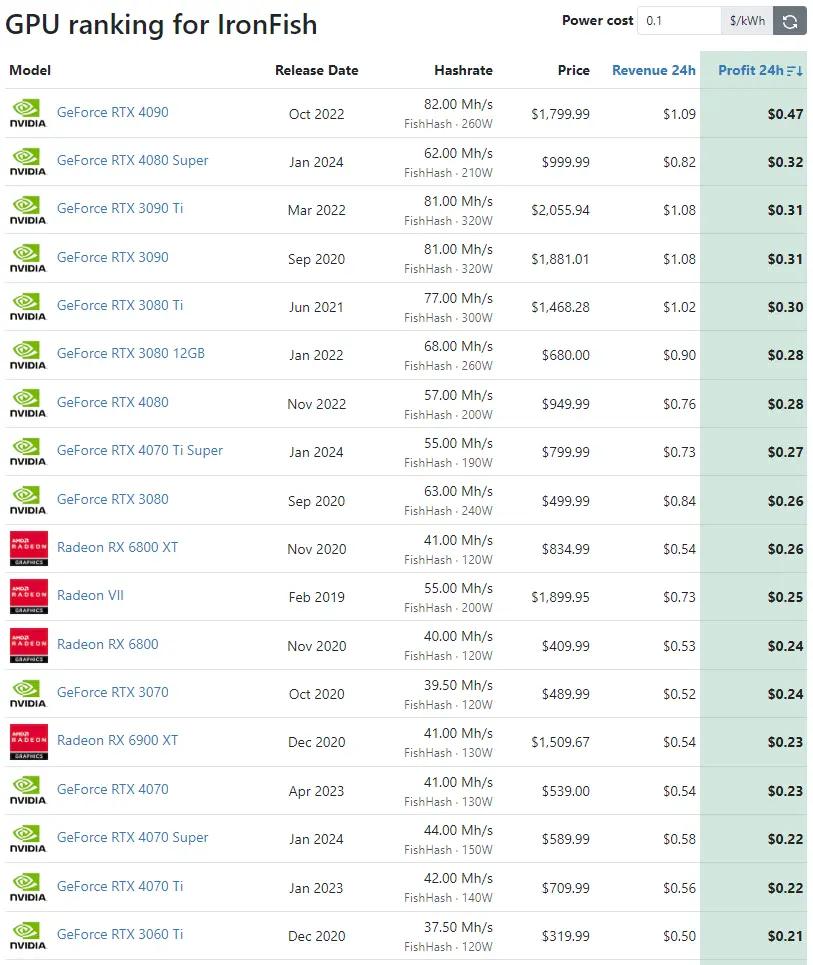
Based on the information you can find on whattomine.com here are the most powerful GPUs to mine Iron Fish, with prices and power consumption. If you don’t care about electricity or you have free electricity available, this is a table for you. The only thing that matters to you is the price per Mh/s.
| GPU Model | Price per MH/s |
|---|---|
| GeForce RTX 3080 | $7.94/MH/s |
| GeForce RTX 3060 Ti | $8.53/MH/s |
| GeForce RTX 3060 | $9.19/MH/s |
| Radeon RX 5700 | $9.25/MH/s |
| GeForce RTX 3070 Ti | $9.71/MH/s |
| GeForce RTX 3080 12GB | $10.00/MH/s |
| Radeon RX 6800 | $10.25/MH/s |
| GeForce RTX 4060 | $12.21/MH/s |
| Radeon RX 5700 XT | $12.31/MH/s |
| GeForce RTX 3070 | $12.40/MH/s |
The best GPU in terms of price per MH/s for mining Iron Fish is GeForce RTX 3080 ($7.94/MH/s), second is RTX 3060 Ti ($8.53/MH/s), and third is RTX 3060 ($9.19/MH/s). Keep in mind that those are prices of brand-new GPUs, if you manage to find a good deal on a second-hand GPU, it can be different.
The most efficient GPUs for Iron Fish mining
If you care about electricity or don’t have cheap electricity, you should look for the most efficient GPU available, we sorted GPUs based on the biggest hashrate to power consumption. Here is a table:
| GPU Model(s) | Efficiency (MH/s/W) |
|---|---|
| Radeon RX 6800 XT / Radeon RX 6600 XT | 0.342 |
| Radeon RX 6800 | 0.333 |
| GeForce RTX 3070 | 0.329 |
| RTX A2000 6GB (*) | 0.325 |
| Radeon RX 6600 | 0.317 |
| GeForce RTX 4090 | 0.315 |
| Radeon RX 6900 XT / GeForce RTX 4070 | 0.315 |
| GeForce RTX 3060 Ti | 0.313 |
| Radeon RX 6700 XT | 0.305 |
| GeForce RTX 4070 Ti | 0.300 |
| GeForce RTX 4060 / Radeon RX 6650 XT | 0.300 |
As you can see the most efficient GPUs for the Iron Fish algorithm are AMD RX 6800 XT or RX 6600XT. From Nvidia, the best GPU in terms of efficiency seems to be RTX 3070 and RTX A2000.
It is always about the balance. The balance between the best possible price for GPU, consumption, and power in mh/s. It varies for everybody, but this should give you a rough estimate of what to look for.
Should you mine $IRON in the mining pool or solo?
When it comes to mining, you have always 2 options. You can mine solo or in the mining pool.
The simple answer is usually mining pool, but it depends on your strategy.
Think of solo mining as trying to find a block on your own. If you find it, the whole block is yours (which means a much bigger reward). But finding it can be really hard and might take a long time.
Pool mining is like searching for a block with a group of friends. If anyone in the group finds it, you all share the reward. You might get less than finding it on your own, but you’re more likely to get something regularly because you’re all looking together.
Which mining pool to choose?
When choosing the right mining pool, you usually need to look into the specifics:
- Fees: Pools charge fees for their services. Look for one with reasonable fees so you keep more of your rewards.
- Payout Scheme: Some schemes are pay per share (PPS), pay per last N shares (PPLNS), and pay per share plus (PPS+). Each pays based on the share of work contributed, with different payout calculations for each type.
- Location: A mining pool closer to you (server) has lower delays (lag) when sending your mining work. This can make your mining slightly more efficient.
- Reputation: Pick a pool known for being reliable and fair to its miners.
Best mining pools for Iron Fish
Kryptex mining pools
One of the most reliable mining pools our there. They use PPS+ payout scheme that pays regularly, while other pools with PPLNS pay only when they find blocks.
Main features
- Very reliable
- Low fees with PPS+ payout: 1%
- Kryptex App to monitor and use your mined crypto
unMineable
With unMineable you can mine any of your favorite coins. Just set up your crypto wallet and they will exchange other mineable coins instantly for your preferred coin.
Main features
- Mine any favorite coin
- Even lower fees(0,75%) with code: qjpg-d083
- unMineable App for monitoring your mining
If you want even lower fees (0,75%) instead of 1%, set up our referral link. Example: MATIC:Address.Worker#qjpg-d083
Other supported mining pools for Iron Fish
Choose the right mining software
When it comes to choosing the right mining software, there are plenty of options. All miners are very similar and have just slight differences. According to the official Iron Fish webpage, those are miners that support the Iron Fish algorithm:
How to create an Iron Fish wallet
1. Step: Choose the wallet
At first, you need to create a wallet that supports Iron Fish cryptocurrency. There are 3 options available right now:
For our test mining guide, we choose the Iron Fish Node App. It is convenient and you can run the whole Iron Fish blockchain, so it is safer and more decentralized.
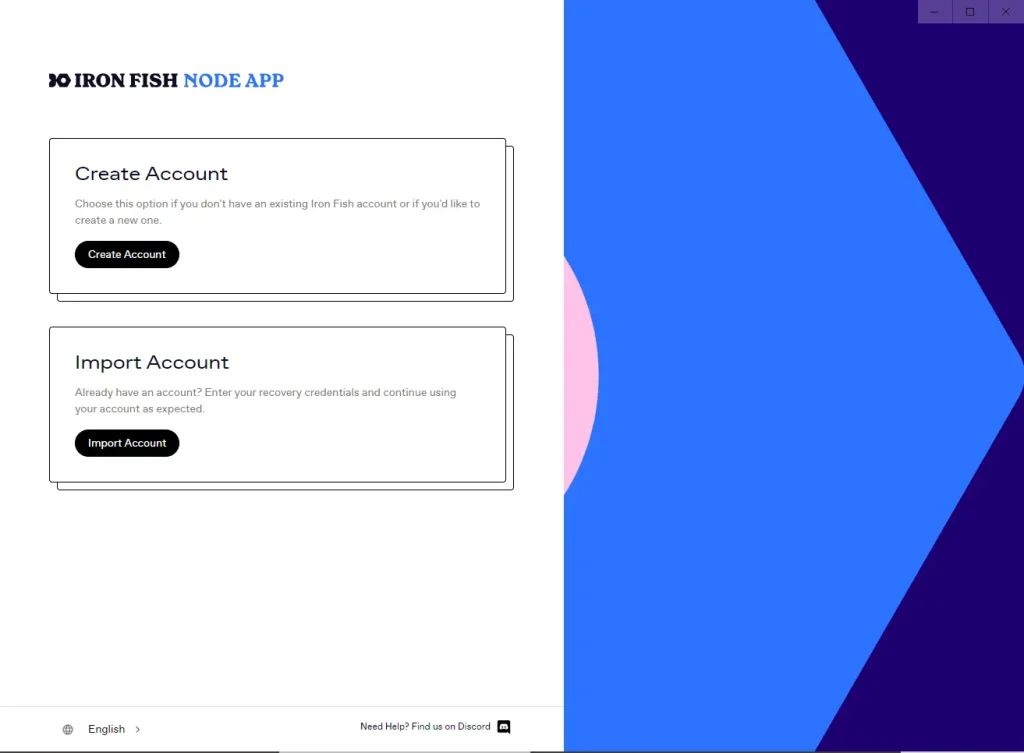
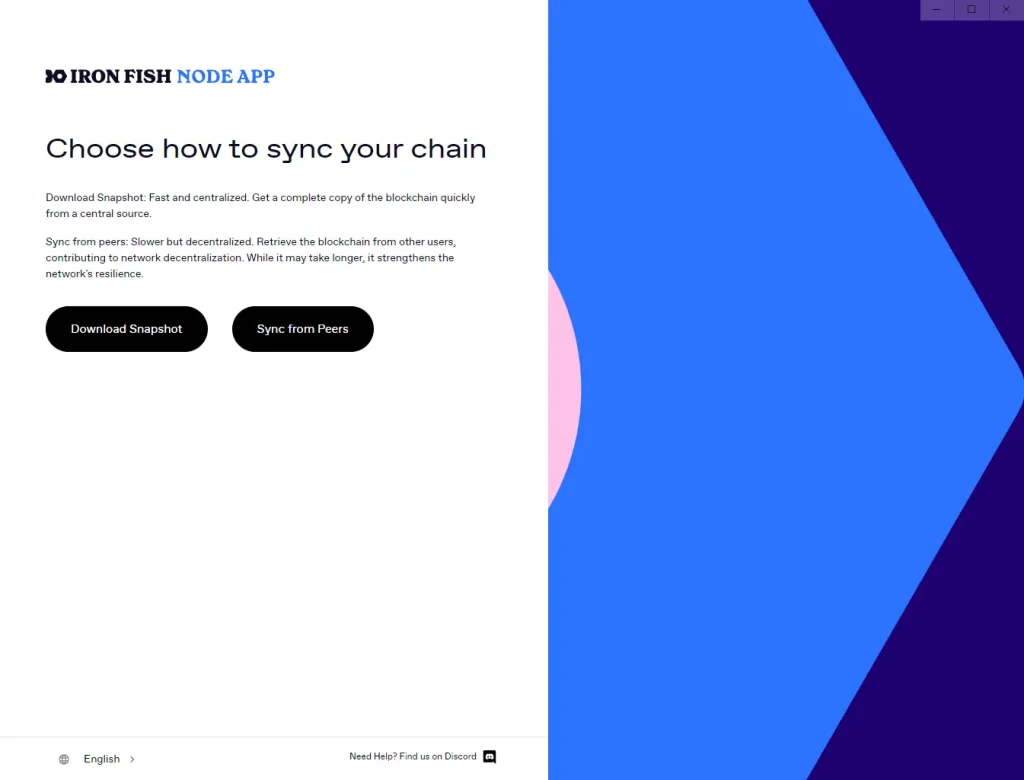
2. Step: Choose sync option
You have 2 options. You can download a snapshot of the whole blockchain from a central source. It is fast but centralized. Or you can sync with other users and contribute to a decentralized network.
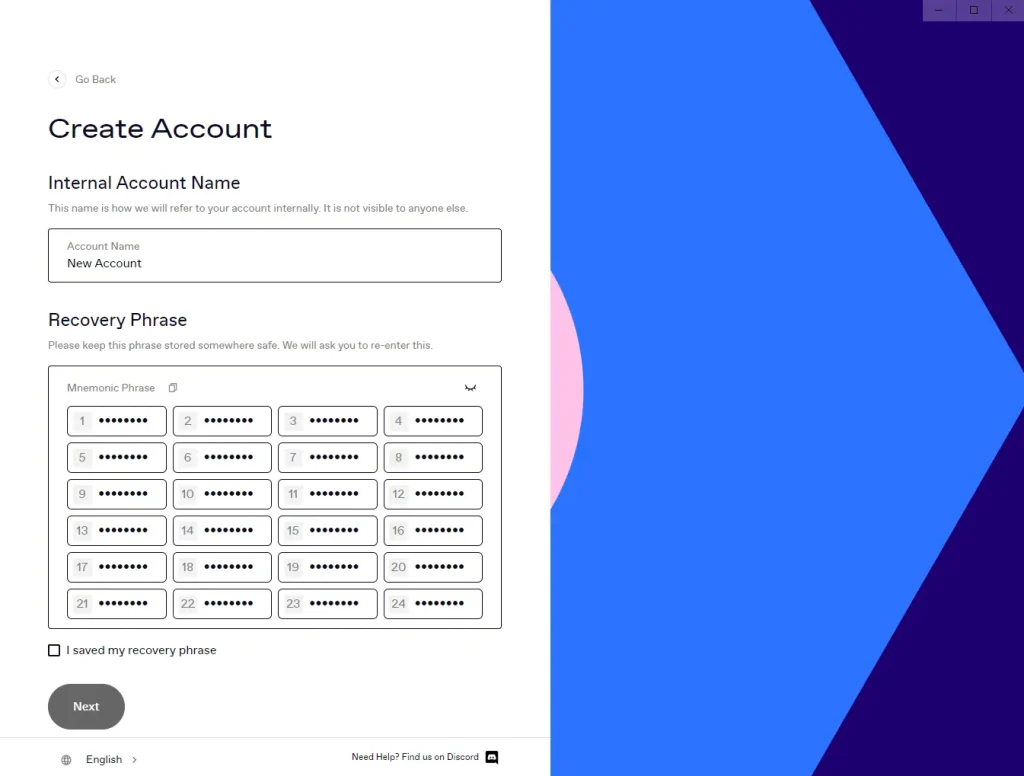
3. Step: Account name and recovery phrase
Now you need to create an account name and save your unique recovery phrases. We recommend writing them down on paper and keeping them in a safe place, rather than saving them on the computer.
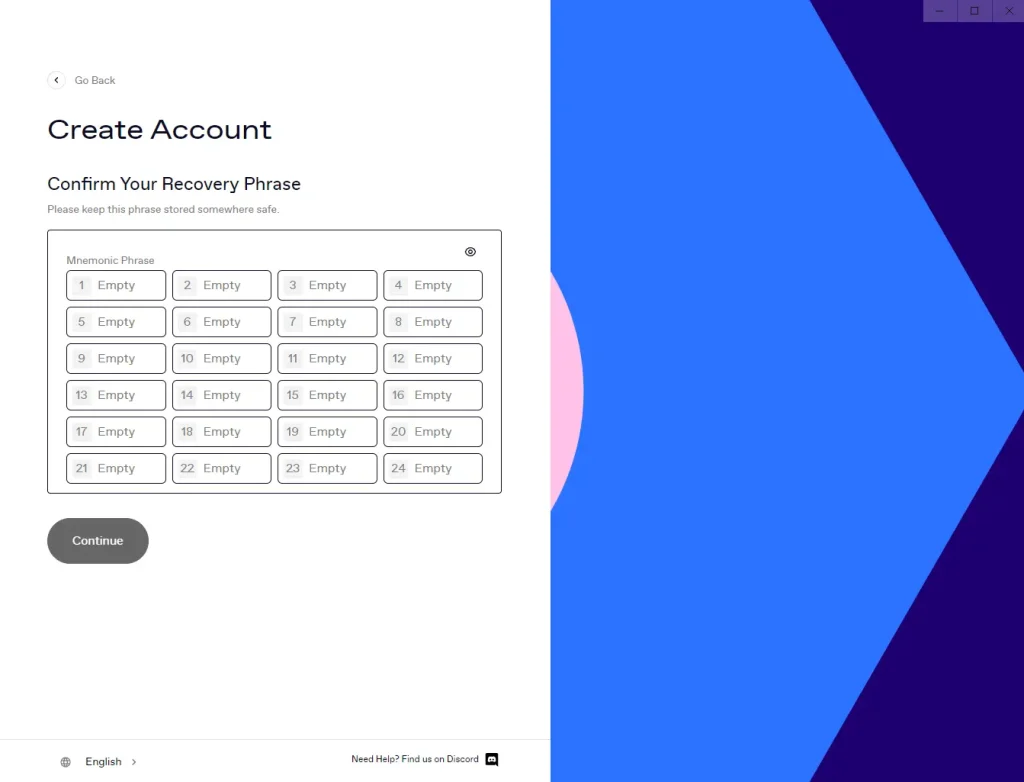
4. Step: Confirm recovery phrase
Now you need to fill in all the phrases you saved, just to confirm the wallet. After that, you are ready to go.
How to mine Iron Fish on Windows?
You can use your desktop PC and GPU for mining at any time. Let’s set up a miner.
1. Step: Download miner
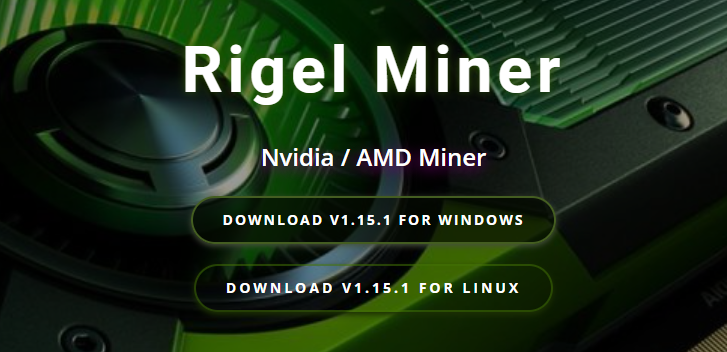
Download the lastest version of miner software from the list we mentioned above. We chose Rigel Miner, as it is compatible with Nvidia GPUs and we will use RTX 3070 in our test setup.
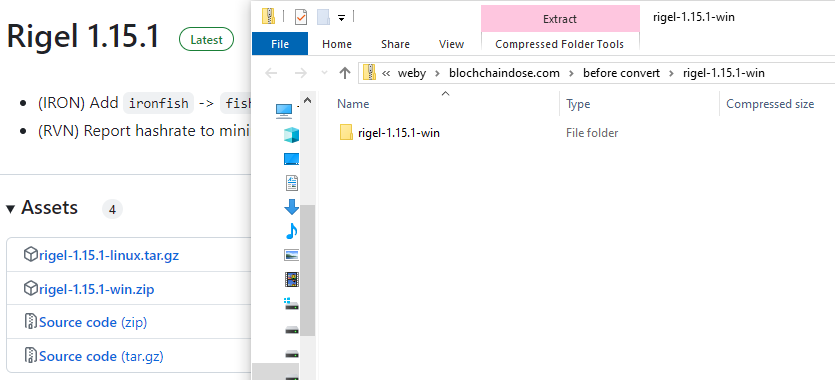
2. Step: Extract miner file
After downloading, file a compressed file and extract it.
3. Step: Find and Edit Iron file
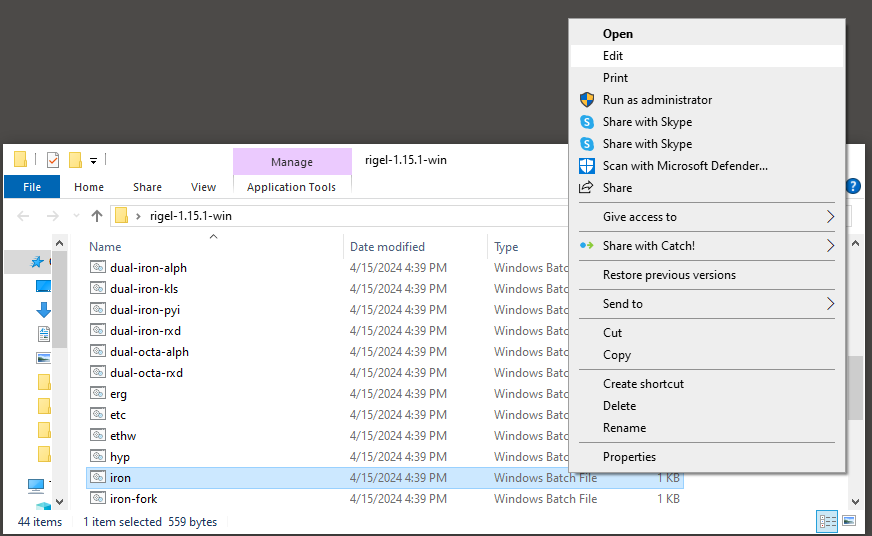
Find a cryptocurrency that you want to mine, in that case, IRON, and edit the file in the Notepad editor.
4. Step: Setup mining file
When you open setup file for IRON mining it will looks like that:
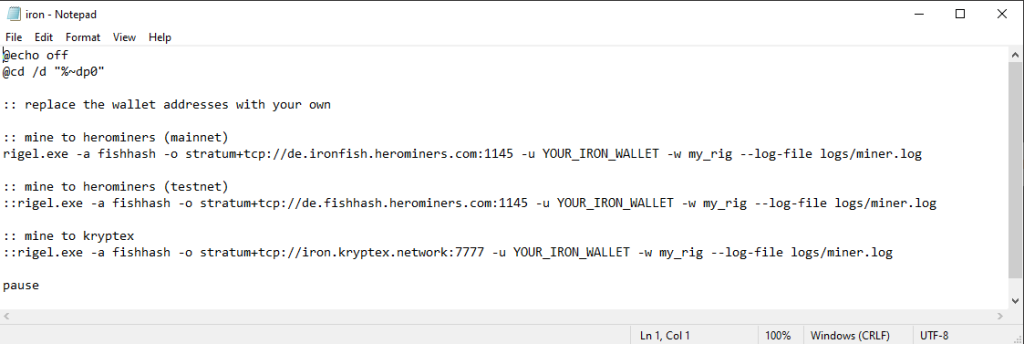
Replace a text with your IRON wallet address and then do the same in the line of mining pool. Also, add a name for your miner. In our case we chose herominers mining pool, so we deleted others. After that don’t forget to save the file.

5. Step: Mining
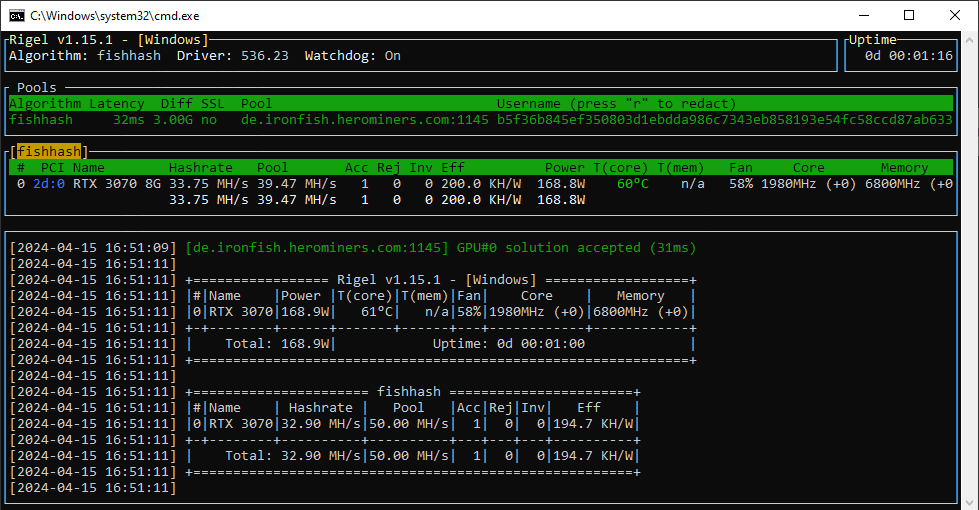
Just start mining by opening the saved IRON file.
6. Step: Setup to start mining right after your PC boots up
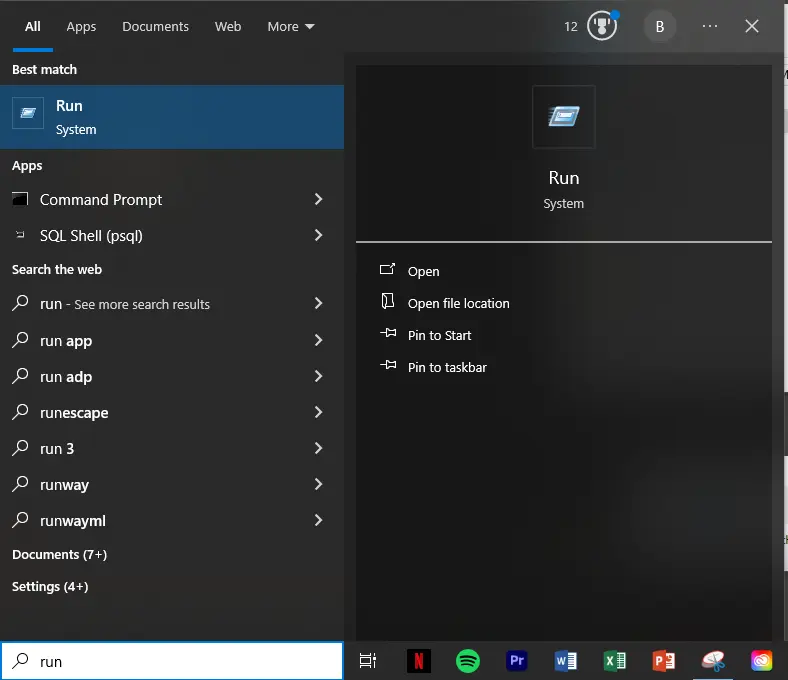
Find Run in the Windows.
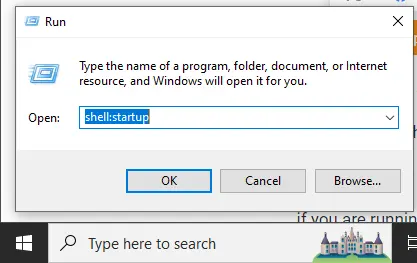
Type “shell:startup” to open the startup folder.
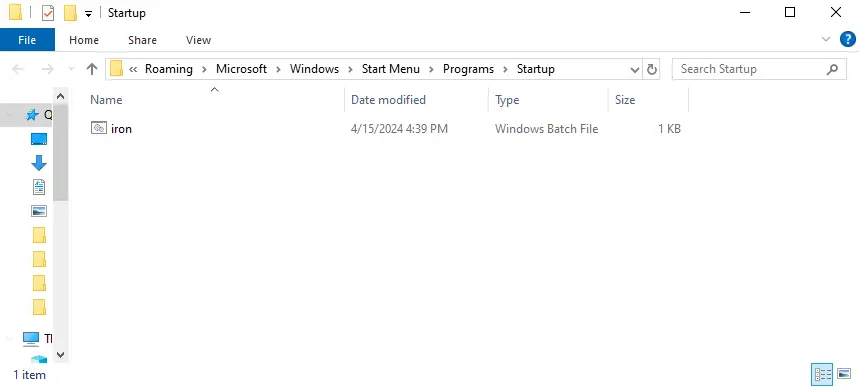
Copy of IRON file in the startup folder. That´s it, now it will automatically start to mine when you boot your PC.
How to mine Iron Fish on HiveOS?
HiveOS is a great option when you have multiple GPUs and want to run a mining rig.
1. Step: Add your Iron Fish wallet to the hiveOS
Navigate to your mining farm, then select the Wallets tab and Add Wallet. If you struggle, check our guide on How to use HiveOS.
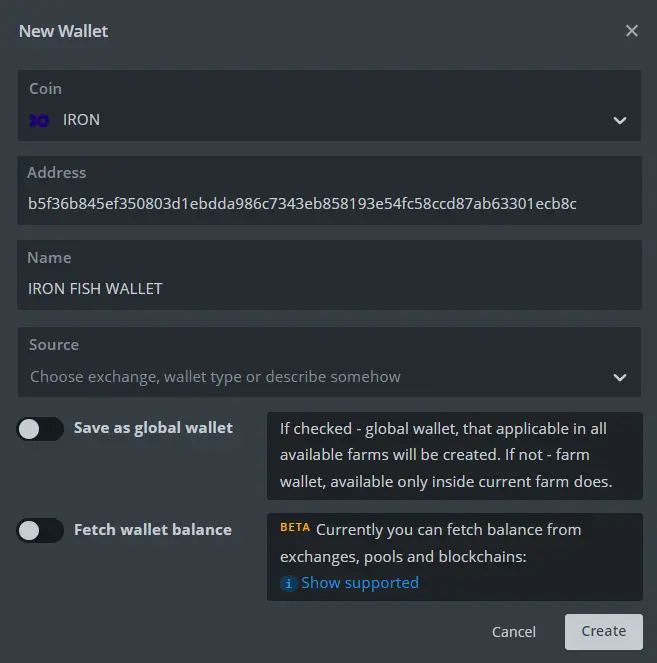
2. Step: Add your Worker (PC or mining rig)
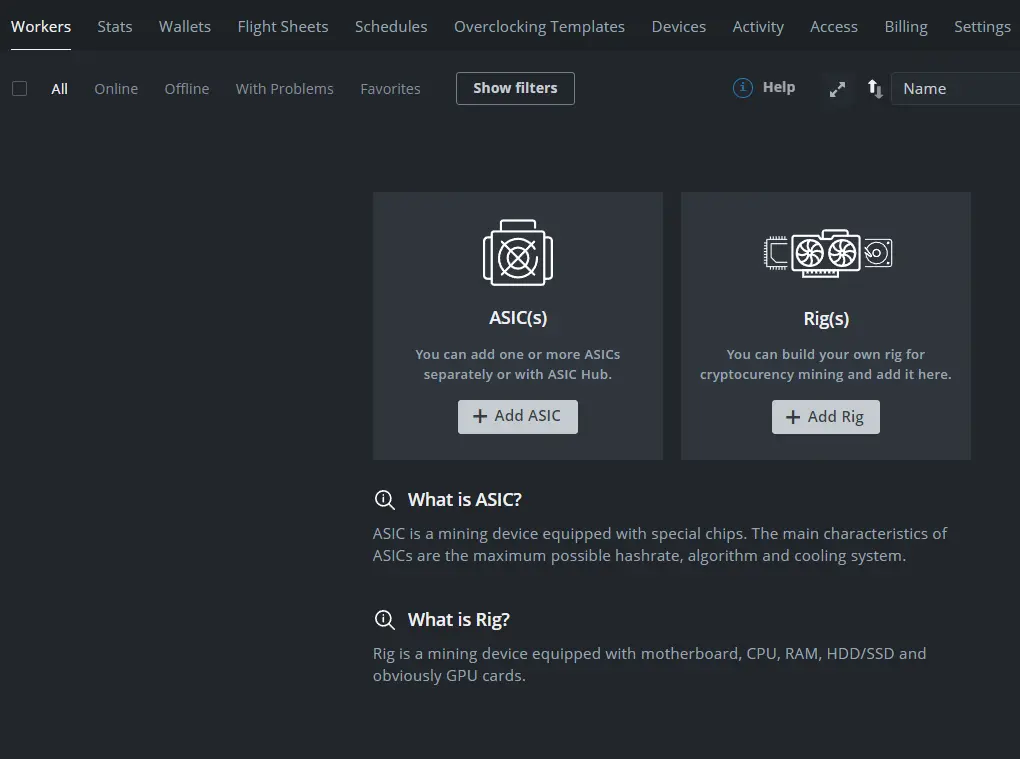
In your mining farm, navigate to the Workers tab and Add Rig
3. Step: Add Flight Sheet
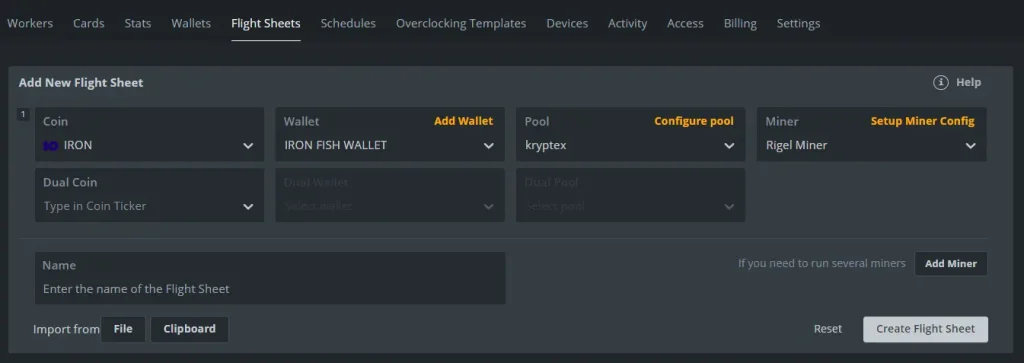
Now we need to Add a new Flight Sheet with the Iron Fish algorithm. Choose IRON coin, your wallet that we created before, mining pool, and miner (mining software).
4. Step: Apply the Flight Sheet to the Worker
The last step is applying your Flight Sheet to the Worker. Press the rocket button and you are ready to go. Your mining rig should start mining $IRON.

5. Step: Mining IRON
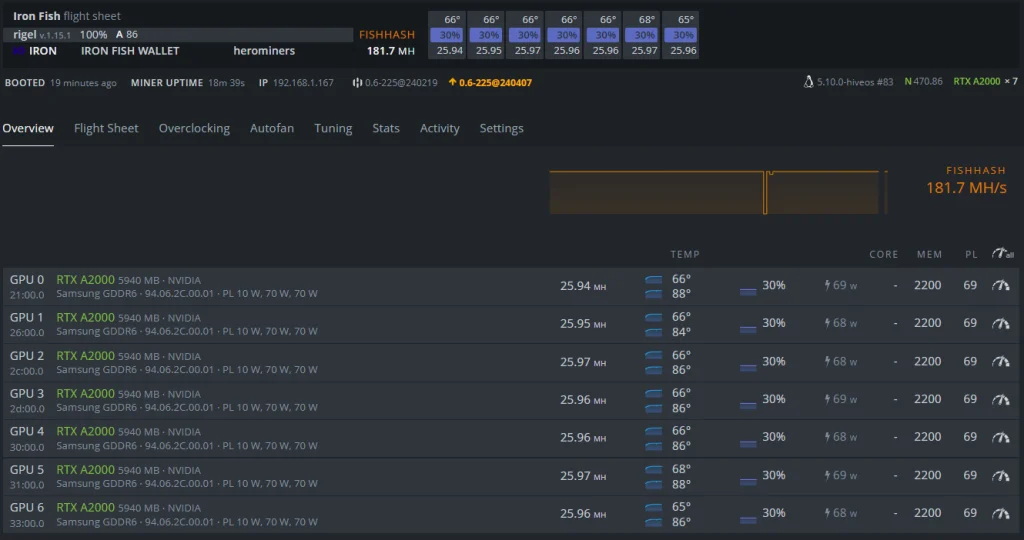
In our case, we had a mining setup of 7x RTX A2000 GPUs that are one of the most efficient. This is how it looks in the HiveOS when you mine IRON.
What strategy to use with mining Iron Fish on GPU?
So this is the part when it is up to you to decide, what strategy you use. When it comes to how to mine you have 2 options.
- Solo mine and try to “hunt” for bigger rewards (Depends more on luck)
- Mine in the pool with a guaranteed daily payout
What do do with mined IRON?
- Sell right after mined (100% profit, when it is profitable at the time of the mining)
- Switch mining profits to different favorite crypto (You can use unMineable for that)
- Accumulate $IRON and play it long-term
We chose the 3. option as we believe that Iron Fish is a very good long-term project to invest in. If you want to learn more about Iron Fish, check out our full coin analysis.
What to expect?
In conclusion, Iron Fish is paving the way for a new era of privacy in the world of cryptocurrencies. Its advanced privacy features, user-friendly design, and commitment to decentralization make it a standout option for anyone looking to conduct secure and confidential transactions.
Mining crypto in general is a long-term play. Don’t expect to get rich fast, there are plenty of strategies and options to pick up at the right time. Making the right moves at the right time can turn mining into a lucrative business model. Sometimes, mining crypto can be beneficial even if slightly unprofitable due to electricity costs. Accumulating coins during these times can pay off when a bull run occurs, multiplying your earnings. This approach requires strategic timing. Knowing when to buy or sell mining equipment is also crucial. Always do your research instead of just copying others. We created this guide to help you learn and try new strategies.
Stay tuned as we continue to explore the latest developments in this exciting space!

